
Google recently announced that the tool publishers use to set up Subscribe with Google has been renamed.
It’s now called the “Reader Revenue Manager”.
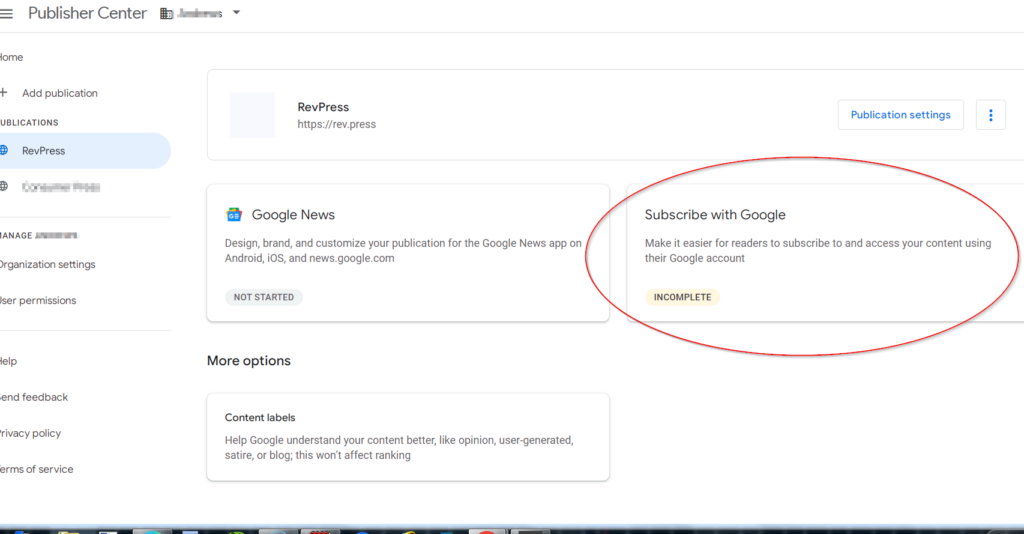
In some of the images included in this article, you will see the tool identified as “Subscribe with Google”.
The Reader Revenue Manager allows publishers to accept and manage subscriptions to their sites or ask their readers for contributions. Google only charges a 5% fee for processing payments.
If you want to use Subscribe with Google on your site, the first step is to enter your site into the Google Publisher Center
Keep in mind that:
A) Subscribe with Google is new. Everything below is subject to change, but I will keep this page updated over time.
B) Subscribe with Google is currently limited to the US, Canada, Brazil, Mexico, Argentina, Chile, Peru, Costa Rica and Colombia.
Before You Get Started
I would recommend doing two things before you get started:
1) Take a look at the Subscribe with Google Content Policies. Don’t bother going through the work of setting this all up if your site doesn’t comply with their requirements.
2) Read through the Terms and Conditions for Subscribe with Google Publishers. It’s located in your Publisher Center at the end of the SwG setup process. You’ll have to agree to the terms as part of the sign up process. It’s an important contract that, if your are successful, sets the terms your income will be based on.
Verify and Add Logo
If you are new to the Publisher Center, the first things you’ll see at the top are a request to verify your site and add a square logo.

Just follow the links to verify your site. It’s pretty straight forward if you already have your site listed in your Search console. If you don’t, just follow the prompts to list it.
As for the logo – you’ll need a big (1000x1000px) logo to represent your site or company. Even though it’s big, it’s going to be displayed pretty small, like an icon. So keep it simple and easily recognizable.
Click the ‘add logo’ link to upload it. You won’t need to add the rectangle logos that can also be uploaded on that page unless you are also applying for Google News.
Next, you’re going to start going down the list and taking care of the details.
Subscriptions, Contributions, and the Paywall
Click on ‘Select whether or not to have a paywall’.
Here you will need to decide if you are going to have subscriptions or request contributions.
Subscriptions – you can set up subscriptions with or without a paywall, including a mix where you ask for subscriptions on free pages but have other pages with a paywall. Later in the set up process, you can give subscribers the option of monthly/quarterly/annual subscriptions by adding different plans, and you’ll have the option to include a set number of ‘free reads’ for your paywalled content.
Contributions – you have the same basic options as above, but the prompt uses the word ‘contribution’ rather than ‘subscription’ and the prompt is laid out differently. In addition, you can give contributors the option of one time or monthly/quarterly/annual contributions, and set up different contribution levels.
Here’s more on the differences between Subscriptions and Contributions with examples.
After saving your ‘subscription’ or ‘contribution’ selection, you’ll be able to move to the next step.
Your Pricing Plan
Here’s where you get to enter the cost of your plan and the benefits.
If you selected the subscription model, you’ll just set up one price/plan at this point. You will be able to add more plans later.
If you go with the contribution model, you’ll have a number of contribution levels and timeframes you’ll have to enter. Go ahead and fill all of these out. Later you will be able to select which ones you actually want to use.
Either way, you’ll be able to list up to three benefits for each plan. There’s a preview pane to the right of these settings so you can see what your subscription prompt will look.
Label Your Product ID
Next you’ll be asked to create a product ID
Your “product” is the articles that you are providing access to in your plan.
You can make it a number or a word. It will be easiest if you make the ID something easy for you to use as a reference. Like ‘basic’, ‘premium’, etc.
The product ID you enter will be used on a small snippet of code that you add to your paywalled pages.
Google will use the code to know what users have access to on your site.
For example, if a user subscribed to a plan with the label ‘premium’, when Google finds that product ID in the code snippet, it will give that subscriber access to that page. Everyone else will see the subscription prompt.
You will be able to set up different plans, say perhaps a monthly, quarterly, and annual plans, all mapped to that same ID, so they can all access the same content.
You can also add more than one product ID to a plan. For example, you might have a ‘basic’ plan and a ‘premium’ plan. The ‘basic’ plan would include the product ID ‘basic’, the ‘premium’ plan would include product labels for both.
After saving that, the next step is…
Select or Create Your Payments Profile
I’m not sure why this part is here, honestly.
It might simply be the way they establish your identity.
It looks like Google is setting it up for you, as the publisher, to pay. But there isn’t an up cost for setting Subscribe with Google on your site. And the ongoing cost (5%) is subtracted from what they send to you after processing the subscriptions.
You do have to complete it to continue though.
Another oddity – they ask what you are selling – with options like food, cars, computers. I selected “internet, network and digital media” as what I was selling. Seemed to be the closest fit.
I hope Google either revises this section or explains it better in the future.
Finalize Pricing
After setting up your Payments Profile, you can “finalize” your pricing.
When you click thru to do that, you’ll see this ominous warning…
“Once your amounts are made live, decisions made in your pricing setup until now cannot be edited.”
That makes it sound like you can never make changes. But you can. If you want to change something later, you ‘archive’ that plan and make another plan or plans.
What there isn’t a way to do (for now), is change a plan once someone signs up for it. The Help Center indicates that a subscriber’s plan can be changed with a 60 day notice, but I don’t think a way to do that has been implemented yet.
You will be able to archive plans with subscribers on them, so that specific plan is no longer offered on your site. But those subscribers stay on that archived plan. Then you would create new plans to offer to new subscribers.
Add Code Snippets To Your Site
Once you have a live plan, you can click on ‘Add code snippets to your site’.
Depending on your set up, you may get two or more snippets.
The code snippets look like this. Yours will vary based on your settings:
<script async type="application/javascript"
        src="https://news.google.com/swg/js/v1/swg-basic.js"></script>
<script>
  (self.SWG_BASIC = self.SWG_BASIC || []).push( basicSubscriptions => {
    basicSubscriptions.init({
      type: "NewsArticle",
      isAccessibleForFree: false,
      isPartOfType: ["Product"],
      isPartOfProductId: "Cb-xxxxw:premium",
      autoPromptType: "contribution_large",
      clientOptions: { theme: "light", lang: "en" },
    });
  });
</script>
This code will need to go into the <head> section of your html code on the pages you wish it to apply to.
If you have a WordPress site – RevPress is a WordPress plugin that will make this easy.
Finish Up and Activate
Last part!
You’ve already set up your square logo and verified your site and identity.
You’ll need to add links to the terms of service and privacy policy pages on your site. Google has not provided any specific details that you need to include when using Subscribe with Google.
Next you’ll need to sign off on those Terms and Conditions I mentioned earlier.
Then, when you are ready, activate your plans.
Once you do that, more options will open up to you, including the ability to allow a limited number of free reads, add/edit additional text on the subscribe prompt, and tell Google where to send your payments!